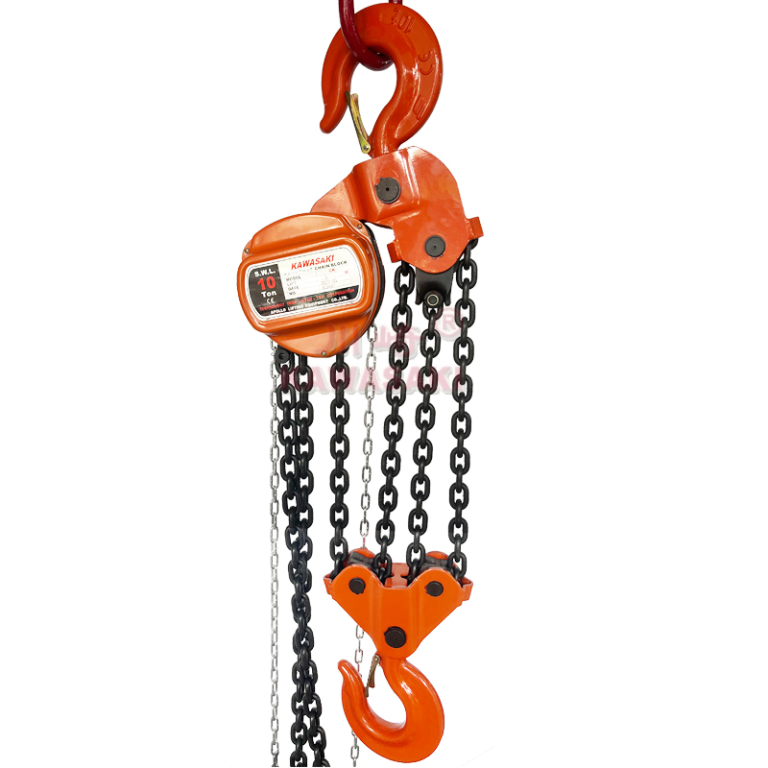
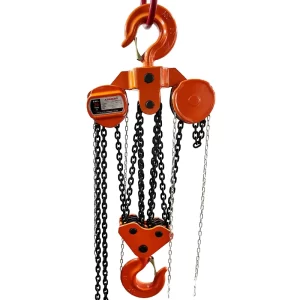
Chain blocks (manual hand-chain hoists and their powered cousins) are deceptively simple: a load chain over pockets or sheaves, gears to multiply input effort, and a mechanical brake to hold the load. In heavy-duty duty cycles—shift work, frequent lifts near rated capacity, abrasive or corrosive atmospheres—wear accelerates fast. Preventive maintenance is how you keep reliability high and failure risk low without over-servicing or grounding equipment unnecessarily. Below is a comprehensive, practical program you can implement or benchmark against your current practice.
1) Build on first principles: OEM + standards + data
Start with the manual. Every reputable hoist has a service manual specifying lubricants, torque values, inspection intervals, discard criteria, and testing procedures. Those instructions take precedence. Pair that with applicable codes/standards in your country (e.g., those governing hoists and slings), and then refine your maintenance based on data: hours of use, number of lifting cycles, peak loads, environment, and inspection findings.
Why it matters: Two otherwise identical hoists working in different environments (salty offshore air vs. clean warehouse) need different schedules and products. A one-size-fits-all quarterly inspection is often too much for light use and not nearly enough for heavy-duty use.
2) Daily pre-use checks: the cheapest reliability booster
A disciplined operator walk-around before the first lift catches most problems early and costs minutes:
-
Load path & rigging: Hook latches close fully; no cracks, distortion, or sharp nicks. Sling/tagline clear; no side-pulling or tip-loading of hooks.
-
Load chain (load side): Proper lubrication film, no rust bloom, flat spots, deep nicks, burrs, bent or twisted links, tight or “frozen” links, or visible elongation. Chain runs smoothly through the pocket wheel with no jumping.
-
Hand chain (pull chain): Not kinked, twisted, or jammed.
-
Brake function: With a small test load, verify positive hold with no creep.
-
Labeling: Capacity legible; serial number present; readable inspection tag.
-
Trolley/suspension: For beam-mounted units, check wheel wear, side plates, and that the hoist is centered and level.
Operator empowerment is key: if something looks wrong, the hoist is tagged out—no “just this one lift.”
3) Cleanliness & lubrication: treat the chain as a precision bearing
Cleaning. Wipe chain and exterior with lint-free rags. Avoid aggressive solvents around the brake housing; vapors or overspray can contaminate friction discs and cause load creep. Use mild degreasers only where specified and keep them off the brake.
Lubrication. The load chain is a bearing that articulates under load; boundary lubrication minimizes link-to-link wear and pocket abrasion.
-
Product choice: Use the OEM-specified chain lubricant or an equivalent high-adhesion, penetrating oil formulated for alloy load chain. In dust-heavy environments, switch to a dry-film or low-tack lubricant to avoid forming grinding paste.
-
Application: Light, even film on a clean chain; avoid dripping. Excess lube migrates into the brake, causing slip.
-
Frequency: For heavy-duty use, lube daily or after each cleaning. In corrosive atmospheres, re-apply more often and after any water washdown.
-
Pocket wheel & guides: Lightly lube contact surfaces if the OEM allows it; some designs run dry.
Pro tip: If you see black paste packed in chain pockets, you’re likely over-lubricating or not cleaning enough for the dust level on site.
4) Scheduled inspections: what to measure and when
Use a tiered inspection regime that scales with duty cycle and environment. As a baseline for heavy service:
-
Frequent inspection: weekly to monthly (depending on use).
-
Periodic detailed inspection: quarterly to semi-annual.
-
Comprehensive teardown & test: annually (or more often under severe service).
Below are the high-value checks and how to evaluate them.
4.1 Load chain (the life-limiter)
-
Elongation: Measure pitch length over a specified number of links (often 5–10) or use a go/no-go gauge. Trend the actual value; rising elongation indicates wear. Many OEMs flag removal around a few percent elongation—follow your manual’s exact limit.
-
Diameter reduction: Mic the link at crown and at worn spots; excessive thinning is a discard criterion.
-
Surface condition: Reject for deep nicks, gouges, pitting corrosion, heat discoloration (overheating), or any twist/bend that prevents articulation.
-
Stiff links: If cleaning and lubrication don’t restore free movement, retire the chain.
-
Compatibility: Only OEM-specified grade and size load chain is acceptable. Never mix chains or repair by welding.
4.2 Pocket wheel/sprocket and guides

-
Tooth/pocket wear: Look for “hooking,” sharp edges, or shark-fin profiles that can cause chain jump.
-
Chain guide/stripper: Cracks or deformation cause misfeed; replace if worn.
4.3 Hooks and swivel assemblies
-
Throat opening & twist: Measure throat width and compare with original spec; any significant permanent opening or twist is grounds for removal.
-
Wear at saddle: If wear exceeds the OEM limit (often expressed as % of cross-section lost), retire.
-
Latch: Must close fully and resist opening under finger pressure.
-
Cracks: Dye-penetrant or magnetic particle testing (MT) during periodic inspections for critical service.
4.4 Gearing, bearings, and frame
-
Backlash & noise: Unusual grinding or roughness under light load suggests debris or bearing wear.
-
Fasteners & housing: Check torque on critical bolts; inspect castings or plates for cracks, especially near suspension points.
4.5 Brake system (Weston-style on manual blocks)
-
Function test: Lift and hold a moderate test load; there should be zero creep.
-
Discs & surfaces: On periodic teardown, check friction disc thickness, glazing, and contamination. Keep oil and grease away.
-
Springs & pawl: Verify spring free length and condition; pawl engagement is crisp and positive.
4.6 Overload protection (if equipped)
-
Friction clutch or shear device: Verify it slips or activates at the specified torque with a dynamometer or calibrated test.
-
Seal & tamper evidence: Ensure the mechanism hasn’t been altered to defeat protection.
4.7 Trolleys and suspension
-
Wheel tread & flange: Measure wear; check that wheels track square on the beam.
-
Side plates & spacers: No elongation at pin holes; spacers intact; bumpers present.
Documentation: Log each measured value, not just pass/fail. Trends are your early-warning system.
5) Functional tests: no-load, light-load, and rated load
A structured test sequence after service or at periodic intervals validates integrity:
-
No-load: Free running of hand chain; smooth direction changes; no binding.
-
Light-load (5–10% rated): Hoist and lower; verify brake sets immediately when pulling stops; no bounce or slip.
-
Rated load: Hoist to a safe height, hold for the specified time (per OEM/standard), then lower smoothly. Watch for frame strain, unusual noises, brake odor, or temperature spikes.
-
Overload device test (if fitted): Confirm trip/slip torque.
Where mandated, perform a proof load test at the specified percentage of rated capacity under controlled conditions, using calibrated weights or load cells and appropriate safety stands.
6) Environment-specific maintenance: tailor or fail
6.1 Offshore/marine
-
Post-shift freshwater rinse and immediate relube to displace salt.
-
Sacrificial coatings: Maintain paint; touch up chips promptly.
-
Material choice: Consider stainless hand chain and corrosion-resistant options if your OEM offers them.
6.2 Dusty/abrasive (cement, mining, foundry)
-
Dry-film lubricants to avoid grit adhesion.
-
Shortened cleaning intervals; compressed air blow-off (mind brake ingress).
-
Chain guards or socks where feasible.
6.3 Chemical plants
-
Compatibility audit: Verify that materials (chains, hooks, seals) are compatible with fumes or splashes present.
-
Neutralize & rinse after exposure; relube immediately.
6.4 Cold storage & arctic
-
Low-temperature lubricants; standard oils thicken and starve the brake.
-
Moisture control: Prevent condensation; store hoists in tempered spaces when off-shift.
6.5 Hot work areas
-
Heat shielding and high-temp lubricants; discoloration on chain is a retirement flag.
-
No welding near the hoist; heat damage is cumulative and often invisible until failure.
6.6 Food/pharma
-
H1 food-grade lubricants where required; stainless options for sanitation.
-
Tight cleaning controls so chemicals don’t reach the brake.
7) Powered chain blocks: extra attention points
For electric or pneumatic chain blocks working heavy duty:
-
Electric:
-
Limit switches (upper/lower): test every inspection; misadjustment is a top cause of chain jam/over-wrap.
-
Thermal protection: Verify motor thermal cutout works; record trip events.
-
Electricals: Inspect pendant cable strain reliefs, gland seals, and IP ratings; check connectors for heat browning.
-
Gearbox oil: Change per hours-based schedule; use specified viscosity; check for metal fines.
-
-
Pneumatic:
-
Air quality: Maintain filter-regulator-lubricator (FRL); water in the line corrodes internals.
-
Exhaust mufflers: Replace when clogged; backpressure robs torque.
-
Speed control valves: Function smoothly; no hunting or surge.
-
Despite drive differences, load chain, hooks, and brakes remain the dominant wear items.
8) Parts, tools, and torque: don’t improvise on critical items
-
Use OEM parts for chain, hooks, brakes, and load-bearing fasteners. Aftermarket look-alikes invite disaster.
-
Maintain a calibrated torque wrench and follow torque specs for brake covers, gear case bolts, and suspension pins.
-
Keep special tools (e.g., chain gauges, pocket wheel pullers) in a labeled kit to reduce reassembly errors.
9) Records, CMMS, and condition-based triggers
Preventive maintenance becomes predictive when you log data:
-
Hoist ID & location: Tie records to a serial number and asset tag.
-
Usage metrics: Hours, number of lifts, typical load % of rated.
-
Measured values: Chain pitch over 10 links, hook throat dimension, brake disc thickness, pocket wear notes.
-
Findings & actions: Repairs, parts replaced, torque values applied, tech name.
-
Next due dates: Automatically set by usage or calendar, whichever comes first.
If you can add IoT counters (cycle counts, overload events) to powered hoists, use them to trigger inspections earlier than calendar intervals.
10) Training & culture: maintenance only works if operators buy in
-
Operator training: Proper hand-chain pull technique, alignment to avoid side loads, and what to do if the brake feels “spongy.”
-
Rigging basics: No knotting the chain around a load, no sharp edges without protection, no sudden shock loads.
-
Stop rules: Any unusual noise, smell, or behavior = stop, lower to safe, tag out, call maintenance.
-
Feedback loop: Maintenance techs brief operators on what they found; operators report quirks before they become failures.
11) Typical discard criteria (use your OEM’s exact numbers)
While you must follow your hoist’s manual, the spirit of common limits is:
-
Load chain: Retire for measurable elongation beyond the OEM limit, significant diameter reduction, visible cracks, twists, or stiff links.
-
Hooks: Retire for any cracks, meaningful throat opening increase, permanent twist/bend, or excessive saddle wear.
-
Brake discs & springs: Retire when below minimum thickness or free length, or if glazed/contaminated and cannot be restored.
-
Pocket wheels/guides: Retire if pockets are hooked, cracked, or cause chain jump.
-
Trolley wheels: Retire for flats, spalls, or flange wear beyond spec.
Important: Never attempt heat-straightening or welding load-bearing parts.
12) Common failure patterns and the preventive fix
-
Brake creep during hold: Often lubricant contamination. Fix culture: precise lube application, careful cleaning, and brake inspection for glazing.
-
Chain jump/jam: Usually pocket wear or mis-feed from bent guides; catch it early with pocket inspection and guide alignment.
-
Rapid chain wear: Dry operation in abrasive dust. Shift to dry-film lube and increase cleaning frequency.
-
Hook throat growth: Repeated near-capacity lifts + shock loading. Improve rigging practices and monitor throat measurements each inspection.
-
Pendant failures (powered): Cable strain and sharp bends. Add proper strain relief and routing; inspect boots and grommets.
13) Example heavy-duty maintenance schedule (customize to site)
Each use (operator):
-
Visual check of hooks, latches, chain condition, labels.
-
Short lift/hold test for brake.
-
Confirm path is clear; no side load.
Daily (or end of shift):
-
Wipe down, clean chain, apply light film of lube.
-
Check hand chain for twists; ensure free feed through drive.
Weekly (frequent inspection):
-
Measure load chain pitch over set links; record and trend.
-
Check hook throat width and latch function.
-
Inspect pocket wheel visually; verify chain guide condition.
-
For powered units: test limits; check pendant and connectors.
Monthly:
-
Remove chain guard; inspect pocket wheel teeth; check guide/stripper wear.
-
Verify brake external adjustments (if any) and perform hold test at 25–50% rated load.
-
For electric hoists: insulation resistance test (per policy), check gearbox level/condition.
Quarterly/Semi-annual (periodic detailed):
-
Partial teardown: clean and inspect brake discs, pawl, springs; replace if near limits.
-
Non-destructive testing of hooks in critical service areas.
-
Trolley wheel gauging; beam inspection for wear/track issues.
-
Functional test through full travel under rated load.
Annual (or per severe-service hours):
-
Full teardown, detailed dimensional inspection of load path parts.
-
Replace load chain if approaching trend limit even if not yet at the hard stop; heavy service favors proactive replacement.
-
Proof test per code/OEM with documented results.
14) Storage and handling between jobs
-
Dry, clean storage off the ground; cover from spatter/dust.
-
Light lube & rotate the chain before storage; tag with the date.
-
Do not leave a loaded hoist unattended; long-term static loads encourage creep and imprint wear.
15) Cost/benefit: why preventive beats reactive
A chain set and a pair of hooks are cheap compared to a dropped load, injured worker, or extended outage. Facilities that trend measurements and swap parts proactively report fewer unplanned outages and longer overall hoist life because the gearbox/brake never sees the abuse that occurs when chain and pockets get severely worn. Downtime is scheduled, not forced.
16) Quick do-and-don’t rundown
Do:
-
Follow the OEM manual, torque specs, and lubricants.
-
Measure and record chain pitch and hook throat—trend it.
-
Keep lubricants away from friction brakes.
-
Tailor intervals to environment and duty.
-
Use OEM parts for load path components.
Don’t:
-
Over-lubricate the chain or spray solvents near the brake.
-
Mix non-OEM chains/hooks or attempt welded repairs.
-
Ignore small brake creep—fix the root cause immediately.
-
Operate with missing/damaged hook latches.
-
Side-pull or shock-load; no chain knots around loads.
Final word
Preventive maintenance for chain blocks under heavy-duty use isn’t guesswork—it’s disciplined cleanliness and lubrication, focused measurement of a few critical dimensions, environment-tuned intervals, and zero tolerance for brake or hook anomalies. When you turn inspections into trend data and enforce operator culture, you extend service life, stabilize availability, and keep your people and loads safe. If you’d like, I can turn this into a printable checklist and measurement log you can deploy on the shop floor.